
When it comes to painting, one size does not fit all. Painting the interior of your home requires a different approach, materials, and techniques compared to exterior painting. Understanding these distinctions is crucial to achieving the desired results while protecting your property. Below, we’ll explore the key differences between interior and exterior painting while highlighting their unique benefits.
1. Paint Formulation
- Designed for controlled environments without exposure to extreme weather.
- Focused on aesthetics with a range of finishes such as matte, satin, eggshell, or gloss.
- Low or no VOC (volatile organic compounds) options are commonly offered for healthier indoor air quality.
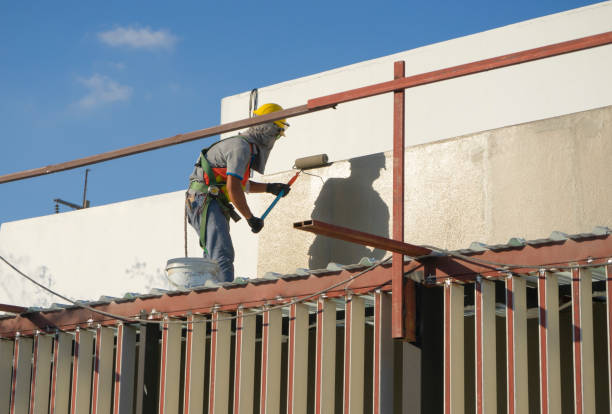
- Engineered to withstand harsh weather elements like UV rays, rain, wind, and temperature fluctuations.
- Includes additives such as mold-, mildew-, and fade-resistant components to ensure durability.
- Typically thicker in consistency for better adhesion and protection.
| Feature | Interior Paint | Exterior Paint |
| Focus | Aesthetics & comfort | Durability & weatherproofing |
| Resistance | Minor abrasion & stains | UV light & moisture |
| VOC Levels | Usually low or zero | May have higher levels |
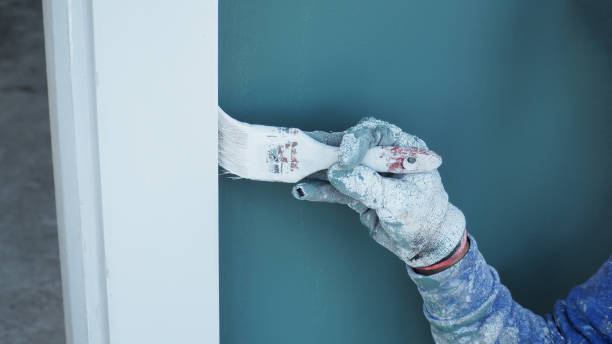
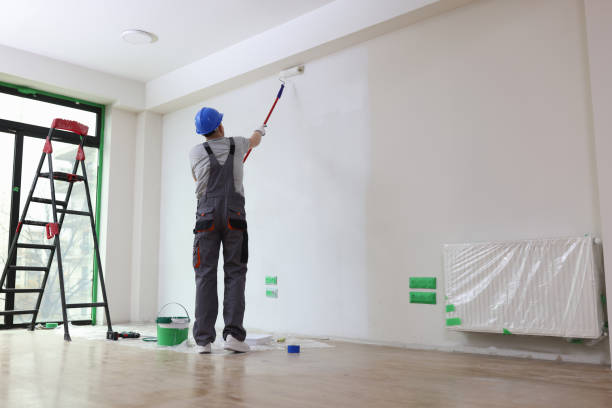
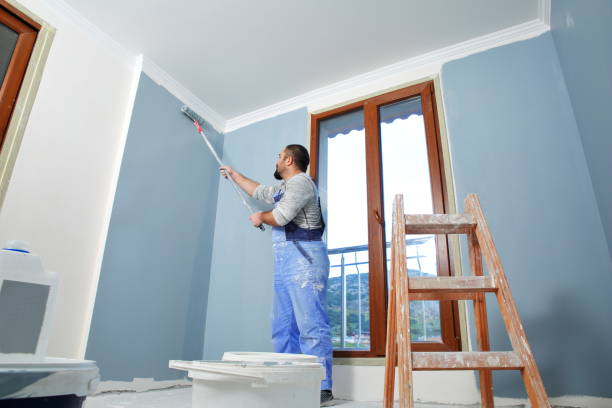
2. Application Techniques
- Precision is key since details like trim work, baseboards, and ceilings are critical.
- Requires tools such as small brushes and painter’s tape for clean edges.
- Typically done in neutral or complementary colors that match furniture or décor.
- Focuses more on coverage and protection from elements rather than intricate detail.
- Uses tools like sprayers or rollers for large surface areas.
- Often applied in multiple coats with durable primers that seal porous surfaces.
3. Preparation Differences
- Cleaning walls to remove dust or grease buildup is essential.
- Masking off areas like windowsills or doorframes prevents accidental spills.
- Repairing drywall cracks enhances the overall finish.
- Washing surfaces with pressure washers removes dirt, mildew, or peeling paint layers.
- Scraping and sanding are often necessary where old paint has deteriorated.
- Primers are applied for better adhesion on wood, stucco, metal siding, etc.
Unique Benefits of Each
- Interior Painting Benefits: Enhances personal comfort by creating a style that reflects individual taste. It also increases resale value by making living spaces more appealing.
- Exterior Painting Benefits: Adds curb appeal while protecting your home’s structure from environmental damage like water seepage or sun bleaching.
By understanding these differences in purpose and process between interior and exterior projects, homeowners can make informed decisions about their painting needs while optimizing both beauty and durability for their homes.
Transform Your Space with a Trusted Painting Company Florida Residents Rely On
Benefits of Interior Painting
- Fresh paint revitalizes tired walls and creates a cohesive design that reflects your style.
- Colors can be used strategically to make spaces appear larger, warmer, or more inviting.
- Soft blues and greens promote relaxation in bedrooms or bathrooms.
- Warm tones like yellows or oranges bring energy to kitchens or living rooms.
- Use contrasting shades for trim or molding to draw attention to architectural details.
- Accent walls can break monotony and serve as focal points.
- High-quality paints protect surfaces from stains, scratches, and moisture over time.
- Washable finishes make cleaning easier, especially in high-traffic areas like hallways.
Key Considerations Before Starting an Interior Painting Project
- Choose the Right Paint Finish: Each finish (e.g., matte, satin, semi-gloss) serves specific purposes:
| Finish Type | Best For | Features | |——————|——————————|—————————————| | Matte/Flat | Ceilings & low-traffic areas | Hides imperfections; non-reflective | | Satin | Living rooms & bedrooms | Subtle sheen; easy to clean | | Semi-gloss | Kitchens & bathrooms | Moisture-resistant; durable | | High-gloss | Doors & trim | Reflective; highly durable | - Color Selection Matters: Choose colors that complement furniture, décor themes, or natural light sources.
- Surface Preparation Is Essential: Clean walls thoroughly, repair cracks or holes with putty, sand down rough spots, and apply a primer for smooth application.
Practical Tips for a Successful Interior Painting Project
- Test paint samples on small sections of the wall before committing to a color.
- Protect furniture by covering it with plastic sheets or moving it out of the room.
- Use painter’s tape to ensure clean edges around windowsills and baseboards.
- Apply at least two coats of paint for even coverage and vibrant color payoff.
When Professional Help May Be Best
- Expertise in handling intricate details like ceilings or staircases.
- Time efficiency since professionals manage prep work through clean-up efficiently.
- Access to premium tools and techniques that ensure durability.
Interior painting transforms your home’s atmosphere while protecting its surfaces from daily wear-and-tear damage over time. Thoughtful planning paired with skilled execution ensures long-lasting results tailored specifically to your needs—and those of anyone sharing the space with you—creating an environment that is both functional yet visually appealing every day.
House Painters Florida: Protecting Your Home While Boosting Its Curb Appeal
Exterior painting serves a dual purpose for any property: it enhances the aesthetic appeal and provides critical protection against environmental elements. Choosing the right materials, colors, and application techniques is essential to ensure your home not only looks great but also stands resilient over time.
https://www.goodreads.com/user/show/198861211-kendall-pest-pest/
The Protective Benefits of Exterior Paint
- Moisture Resistance
Paint acts as a barrier against water infiltration, which can lead to mold growth, wood rot, or structural damage if left unchecked. - UV Protection
High-quality paint deflects harmful UV rays that can cause fading or degradation of materials like wood and vinyl siding. - Prevention of Cracking or Peeling
A properly applied coat of paint prevents surface deterioration caused by weather changes.
Boosting Curb Appeal Through Thoughtful Design
- For traditional homes: Stick with muted tones like beige, cream, or soft grays.
- For modern designs: Experiment with bold colors like deep blues or charcoal accents.
- Pair trim and accent colors smartly for contrast without overwhelming the design.
- Highlight Unique Features
Use contrasting shades on shutters, doors, or other architectural details to draw attention to these elements. - Consider Neighborhood Trends
While individuality is important, blending with surrounding properties creates harmony in the streetscape.
Key Factors for Long-lasting Exterior Paintwork
| Factor | Importance |
| Surface Preparation | Cleaning surfaces thoroughly removes dirt and grime that interfere with adhesion. |
| Primer Application | Primers create a smooth base layer that helps paint adhere better while improving longevity. |
| Weather Conditions | Painting during dry weather at moderate temperatures prevents blistering or cracking as it cures. |
| Proper Tools & Technique | Using high-quality brushes and rollers ensures even coverage without streaks or missed spots. |
When Should You Repaint?

Exterior surfaces typically require repainting every 5–10 years depending on factors such as climate exposure, material type (e.g., wood vs brick), and paint quality used during the previous application. Watch for signs like peeling, cracking, discoloration, or chalky residue — these indicate it’s time for a refresh.
Investing in regular touch-ups not only keeps your home looking vibrant but also prevents costly structural repairs down the road due to neglected surface maintenance.
Exterior painting is more than just an aesthetic upgrade; it’s also a practical measure that safeguards your investment against wear and tear over time while elevating its visual appeal within your neighborhood’s landscape.
Achieving Perfect Painting Results with Expert Painting Services Florida
When it comes to painting projects, two critical factors often determine the quality and longevity of the results: timing and expertise. Understanding these elements can help you avoid common pitfalls, save money, and ensure that your project meets your expectations. Below, we’ll explore why these two aspects matter and how they influence the outcome of both interior and exterior painting projects.
The Role of Timing in Painting Success
Exterior Painting Considerations:
– Weather Conditions: Exterior paint should ideally be applied during mild weather conditions (50°F to 85°F) with low humidity to ensure proper adhesion and curing.
– Seasonal Factors: Spring or early fall are often the best seasons for exterior projects due to stable temperatures.
– Rain Risks: Painting during or shortly before rain can lead to peeling, bubbling, or uneven surfaces.
Interior Painting Considerations:
– Ventilation Needs: Proper ventilation is crucial during interior painting. Plan work during periods when windows can remain open if using solvent-based paints.
– Drying Time: Allow adequate time between coats for drying, particularly in high-humidity environments.
– Personal Scheduling: Choose times when the space will have minimal use to prevent disruptions or accidental damage.
Why Expertise Matters in Painting
While many people attempt DIY painting projects, hiring a professional painter often yields superior results. Professional expertise ensures attention to detail, proper technique, and use of the highest quality materials.
- Professionals know how to properly clean, sand, prime, and repair surfaces before applying paint.
- Poor preparation leads to uneven finishes or paint that doesn’t adhere well.
- Understanding which types of paint (oil-based vs. water-based) suit specific surfaces ensures durability.
- Knowledge of finishes (e.g., matte vs. gloss) helps achieve desired aesthetics.
- Experts use techniques such as cutting-in edges with precision or properly rolling large walls without streaks.
- They minimize waste by using just enough paint while covering areas evenly.
- Professional painters address challenges such as tricky corners, textured walls, or previously damaged surfaces skillfully.
- A professional has access to high-quality brushes, rollers, sprayers, ladders/scaffolding that most homeowners might not readily own.
Comparing DIY vs Professional Expertise in Painting Projects
| Aspect | DIY Approach | Professional Expertise |
| Surface Preparation | Often skipped or rushed | Thoroughly addressed |
| Tools Used | Basic brushes/rollers | Advanced tools like sprayers & pro-grade rollers |
| Time Efficiency | Can take several days | Completed faster due to experience |
| Paint Finish Quality | Risk of uneven coverage | Smooth & consistent |
| Longevity | May require touch-ups sooner | Lasts longer with proper application |
Maximizing Results Through Planning
Combining appropriate timing with skilled expertise maximizes the effectiveness and durability of any painting project—whether it’s refreshing an interior space or protecting an exterior surface from weather damage. Plan carefully around environmental factors if tackling an outdoor job and consult professionals for more complex tasks requiring precision.
Both elements—timing and expertise—ensure that your investment in painting adds value while providing stunning visual results that stand the test of time.
Enhance Your Property with Interior & Exterior Painting Florida for Long-Lasting Value
Investing in professional painting services is one of the most effective ways to enhance your property’s aesthetics, protect its structure, and increase its long-term value. While some may consider DIY painting a cost-effective option, professional painters bring expertise, precision, and quality that ensure your investment stands the test of time.
Benefits of Professional Painting
- Professional painters have the technical skills and experience to deliver flawless finishes.
- They understand how to prepare surfaces properly and use premium materials for a smooth, durable outcome.
- Painting an entire home or building can be time-consuming when approached without experience.
- Professionals complete projects efficiently while maintaining attention to detail, saving homeowners valuable time.
- Skilled painters can advise on color selection, finishes, and paint types that suit your space and climate conditions.
- They ensure you achieve the look you desire while maximizing durability.
- Proper surface preparation, including cleaning, sanding, priming, and sealing cracks or holes, prevents peeling or flaking in the future.
- Professional-grade paints combined with expertly applied layers result in a long-lasting finish.
- Reaching high ceilings or exterior walls can pose safety risks for untrained individuals. Professionals have the equipment needed to work safely at heights.
- Their knowledge of proper ventilation techniques also ensures safety during interior painting projects.
Cost vs. Long-Term Value: A Breakdown
| Aspect | DIY Painting | Professional Painting |
| Initial Cost | Low | Moderate |
| Surface Preparation | May be overlooked | Thorough |
| Paint Quality | Limited by budget | Premium-grade materials |
| Durability | Often short-lived | Long-lasting with proper techniques |
| Time Investment | High (due to inexperience) | Low (efficient completion) |
How Professional Painting Adds Value Over Time
- Increased Property Value: A professionally painted home has better curb appeal and interior aesthetics that attract potential buyers if you plan to sell.
- Structural Protection: Exterior paint acts as a protective layer against harsh weather elements like UV rays, moisture, and temperature fluctuations.
- Reduced Maintenance Costs: High-quality paints applied by professionals reduce future maintenance needs by preventing issues such as peeling or mold growth.
Choosing the Right Professionals
- Research local contractors with strong reputations and verified reviews.
- Request detailed estimates that outline costs for labor, materials, surface preparation processes, and timelines.
- Verify certifications or licenses where applicable.
By selecting reliable professionals who prioritize quality craftsmanship over shortcuts or inexpensive materials, you’ll enjoy long-lasting results that provide both aesthetic satisfaction and financial benefits for years to come.
- Interior vs. Exterior Painting: How Florida Painters Highlight the Key Differences and Benefits
- Key Factors to Consider for Interior & Exterior Painting Florida and How Often to Repaint
- How Often Should You Refresh and Repaint Your House Interior with a Painting Company Florida
- How Often Should You Hire a Painting Company Florida to Keep Your House Looking Fresh
- Key Differences Between Interior and Exterior Paint Explained by House Painters Florida
- A Smart Homeowner’s Guide to Long-Lasting Paint and Professional Results
- Key Differences Florida Painters Consider Between Interior and Exterior House Painting